Back to Don's Maps
 Bushwalking Index
 Lightweight Bushwalking / Hiking Gear
Sewing Hiking Equipment
Click on the photos to see an enlarged version
Making your first project - a ditty bag
Also called a stuff bag when used for stuffing a sleeping bag or tent into, a ditty bag is something you store stuff in - food, clothes, a tent, sleeping bag, whatever.It is easy to make, and gives you practice in using the sewing machine, and the quiet glow of satisfaction you get from making something yourself.
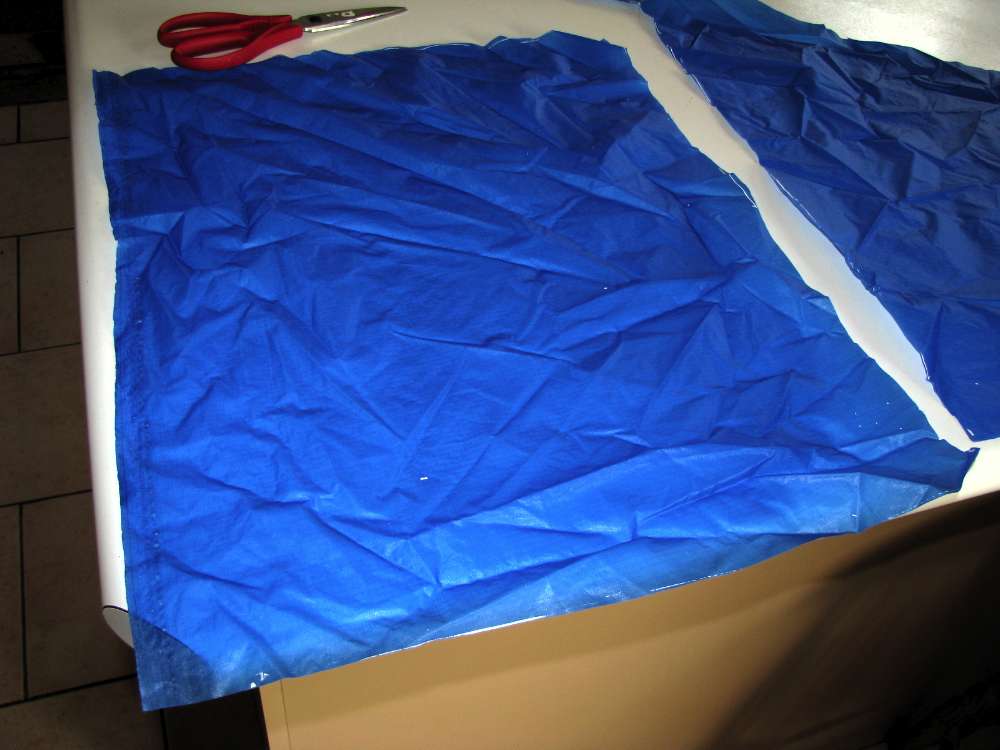
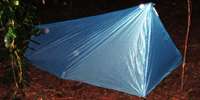
The first step is to cut out the material. Remember that you will lose width and length because of seams, and allow for it. This will be a tent bag for my KiloBeater Mark IVd, the upgrade of the Mark IVc to an integral floor and insect protection.
Photo: Don Hitchcock January 2009
Next fold the piece of material in half, the way it is going to look when complete, but remember that this will be the outside of the finished article and mark the shape of the base, if it is not going to be rectangular. We will be using a French Seam, which is one of the most versatile and easiest seams to make, despite its high falutin' name.
Photo: Don Hitchcock January 2009
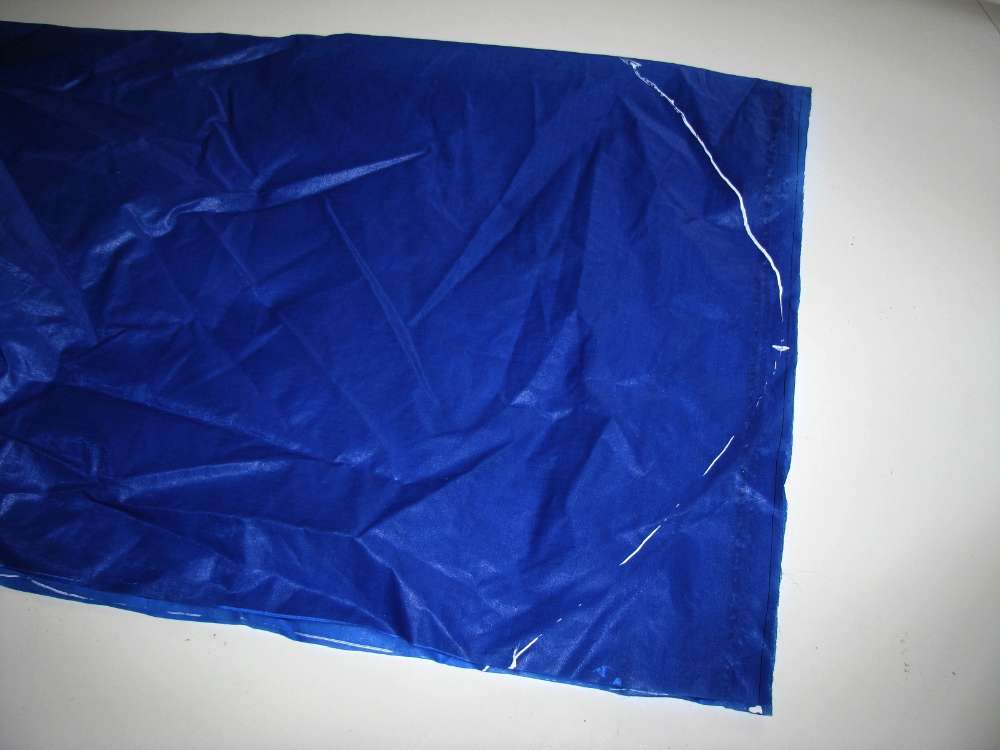
Sew along the line you have marked with a single line of stitching. I use "White out" or "tippex" to mark silnylon. Some brands rub off easily, some stay forever. Mostly I like the ones which rub off fairly easily, the mark is only needed for a short time. Sew up the straight side as well. You could make a round or guitar shaped bag if you wanted, the french seam is very versatile this way.
Photo: Don Hitchcock January 2009

Now cut close to the sewn line, about one eighth of an inch or a couple of millimetres from the edge. Try to keep the same width throughout.
Photo: Don Hitchcock January 2009

Now turn the bag inside out, we are now looking at what will be the inside of the bag, and iron the seam as flat as you can with the iron turned to a low setting such as synthetic. Silnylon is very slippery stuff to work with, but this will help you when you are sewing the next step. Test the iron on a piece of scrap material first to see that it doesn't melt the material.
Photo: Don Hitchcock January 2009
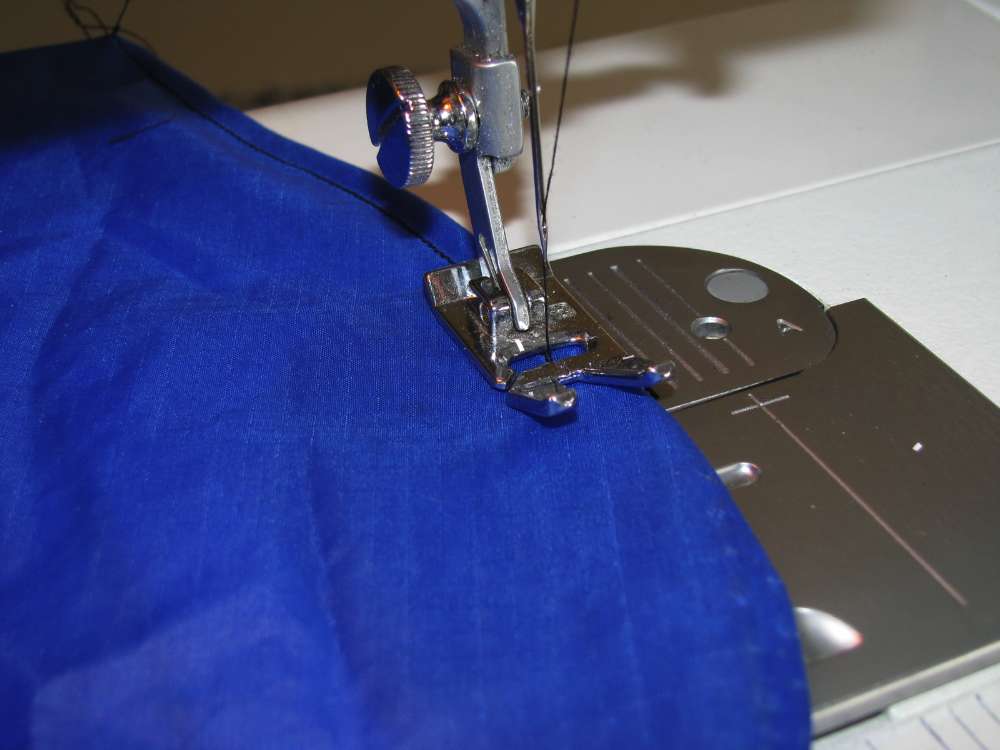
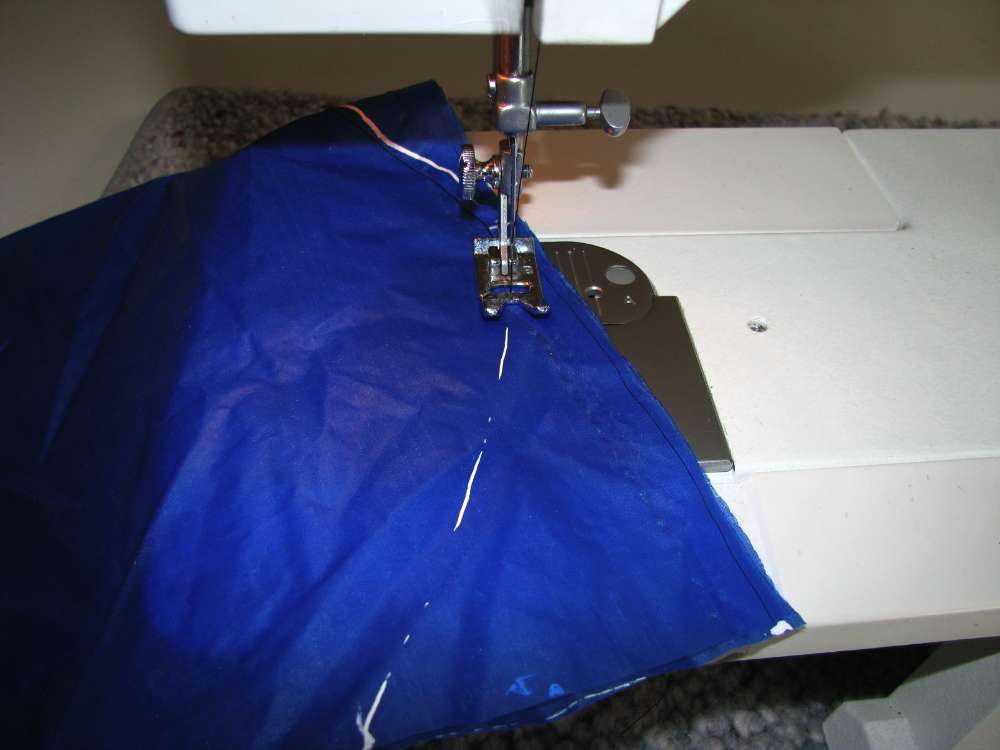
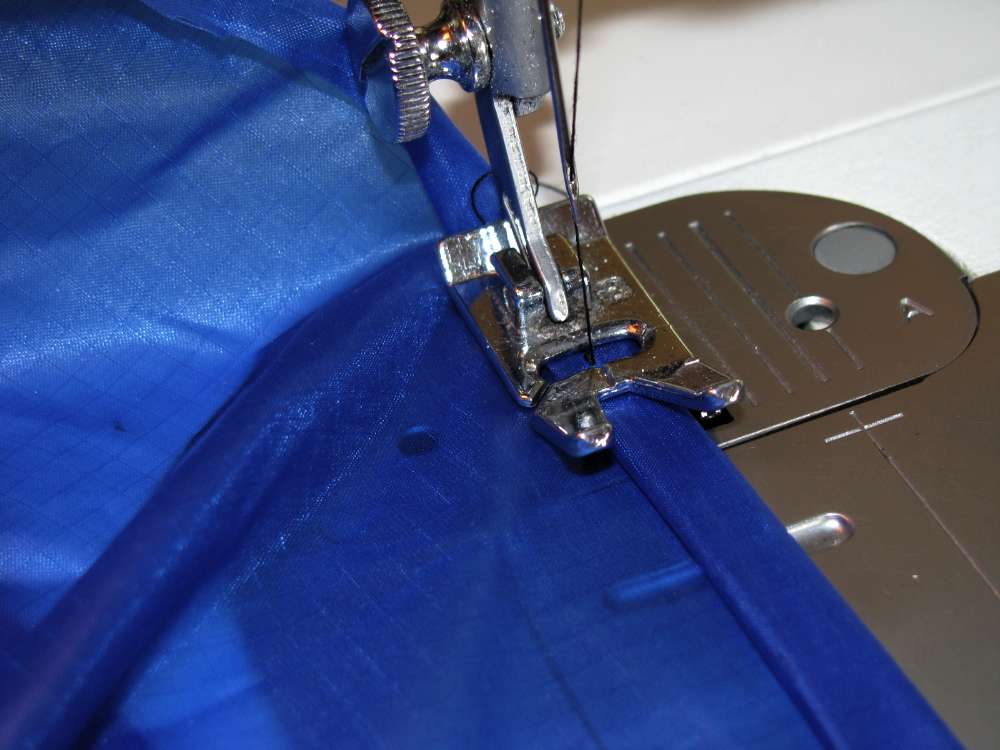
Now sew along the edge of the bag a little more than one eighth of an inch, a quarter of an inch maybe, or three or four millimetres, but far enough that the cut edge is completely enclosed by the new line of stitching.
Photo: Don Hitchcock January 2009
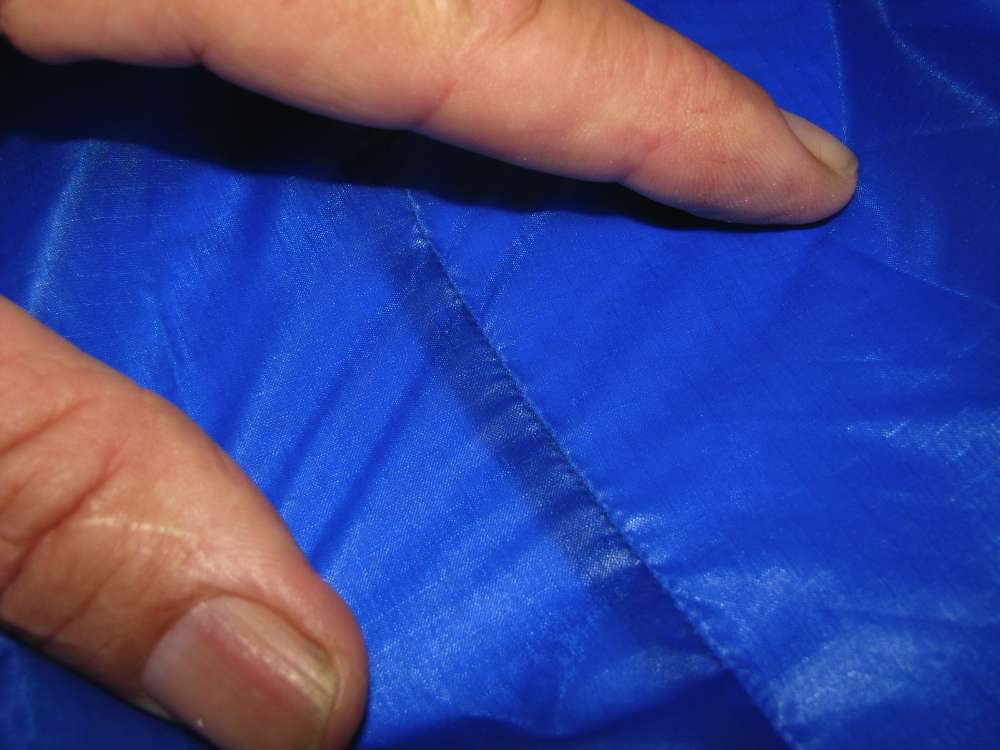
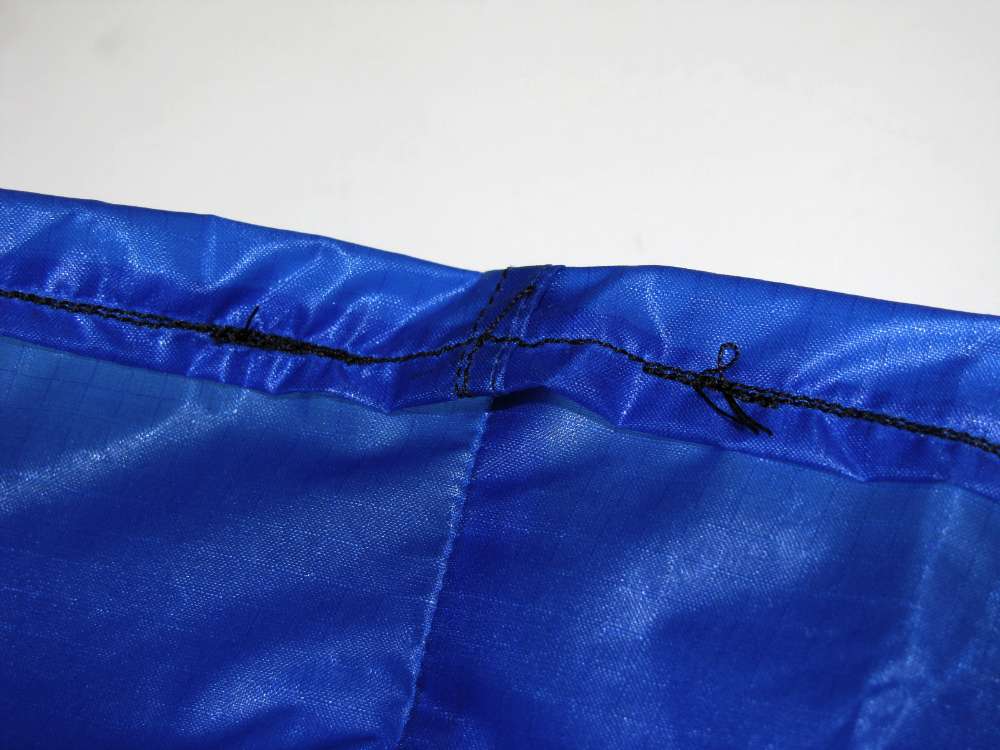
This is what the seam looks like on the inside of the bag.
Photo: Don Hitchcock January 2009
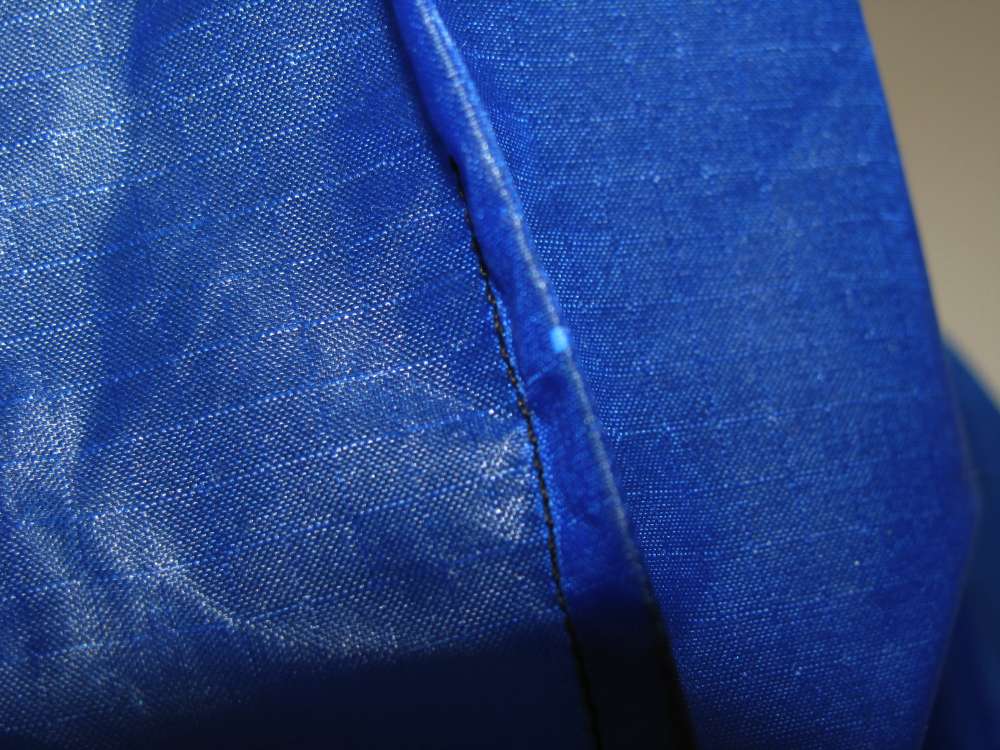
Turn the bag right side out again, and the seam is very neat and strong.
Photo: Don Hitchcock January 2009

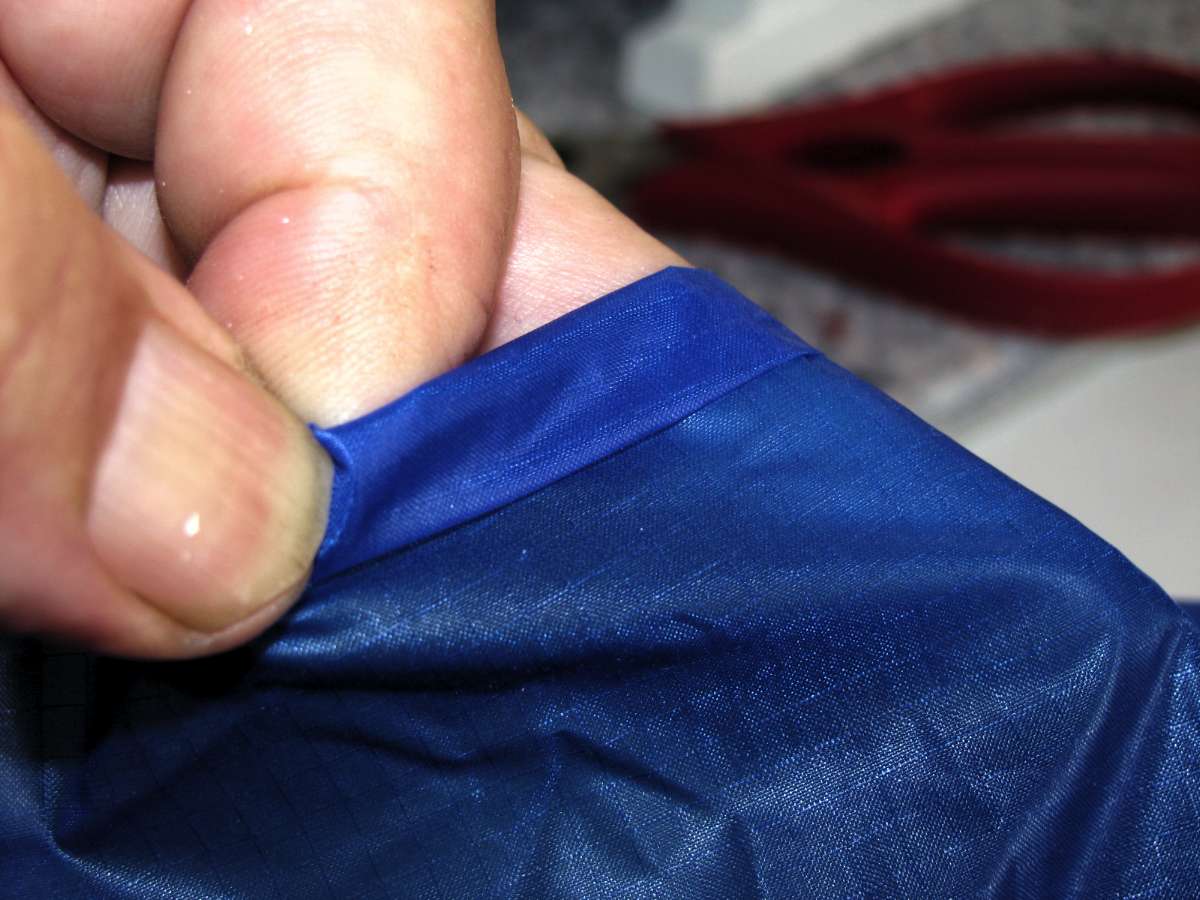
Now we are going to make a "tunnel" for a string to close the bag. The first step is to make a rolled edge or hem. First fold the material towards you towards the outside of the bag.
Photo: Don Hitchcock January 2009
Then fold it over itself again to make a tube, so that the cut edge is completely inside the material.
Photo: Don Hitchcock January 2009
Sew a little bit at a time, making sure that the cut edge is always inside the tube you have formed. There is a special foot you can get for rolled edges, but I haven't used it.
Photo: Don Hitchcock January 2009
Now fold over the top again to make a tunnel. Make it sufficiently wide that you can fit a safety pin through it, you need that to put the string in. Start at the seam running up the side of the bag, and leave a bit unsewn as shown so you can put the string for the closure in. Sew backwards and forwards at this point, so it is strong.
Photo: Don Hitchcock January 2009
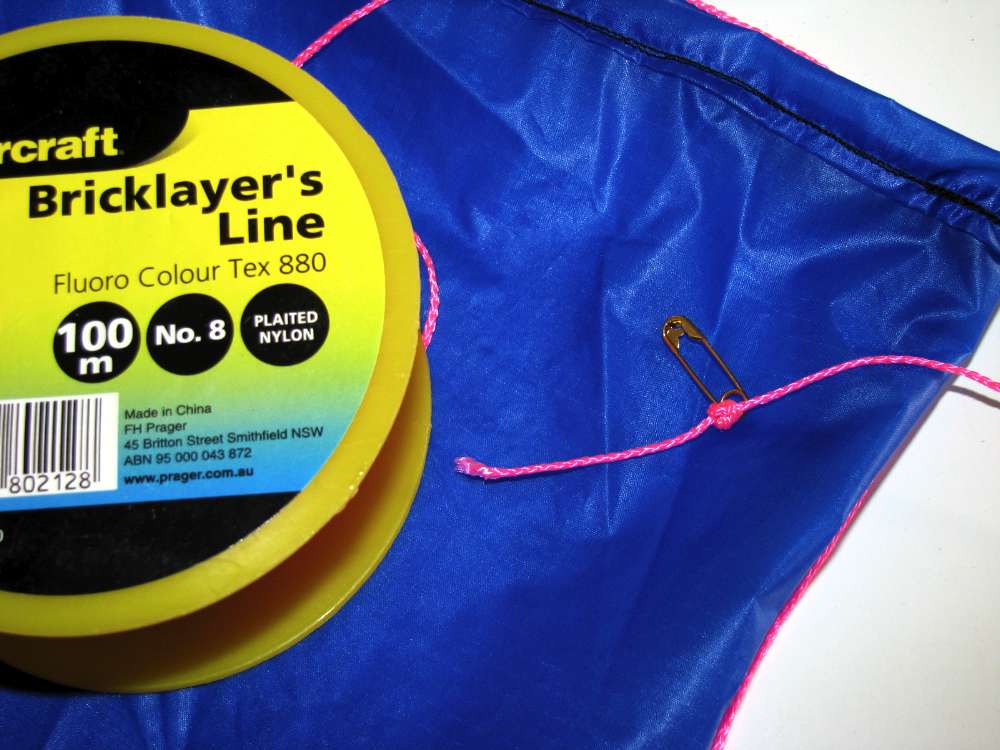
Now you are ready to put the string in. I use Brickie's line, which is a strong and light braided nylon line. Tie the string to a safety pin.
Photo: Don Hitchcock January 2009
Thread the safety pin through the tunnel, and bring it out the other end. Pull it through, leaving plenty of thread extra outside of the tunnel. You can make final adjustments later.
Photo: Don Hitchcock January 2009
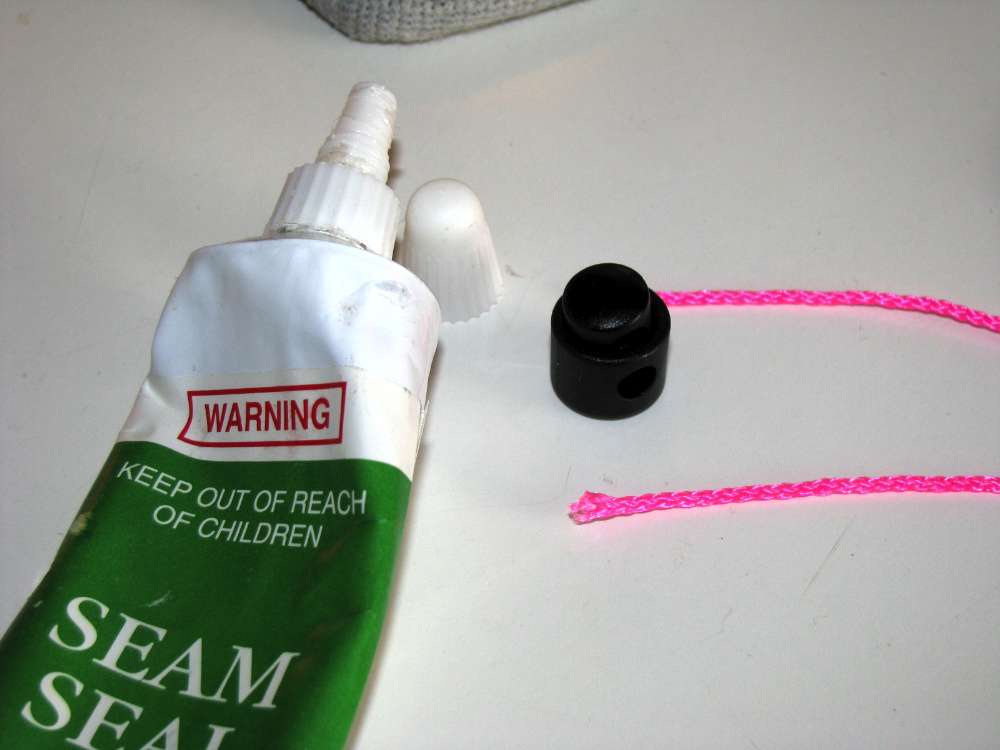
It is not always easy to thread the cord through the cord lock. I use seam seal from Kmart (not suitable for seam sealing of silnylon) to stiffen the cord and keep the threads together. Any glue which dries quickly will do. This one is particularly good because it is thin, and soaks into the thread when using it to make sure knots don't unravel.
For all cord locks and buckles I can highly recommend "Best Buy Button & Buckle" who are at the URL:
http://myebestbuy.com/
Their prices are extremely reasonable, and I have always found their service fast and efficient. There is no minimum order, though there is a discount for large quantities. I now get cord locks and some buckles in quantities of 100 at a time, it's amazing how they mount up once you get into a project, but I started out getting only a few, and that is not a problem so far as they are concerned. It is a pleasure to do business with them.
Photo: Don Hitchcock January 2009

Put both ends through, tie a figure of eight knot, pull it tight, and glue the knot with seam sealer so that it doesn't unravel. Cut the ends of the cords and use a match or lighter to melt and seal the ends.
Photo: Don Hitchcock January 2009
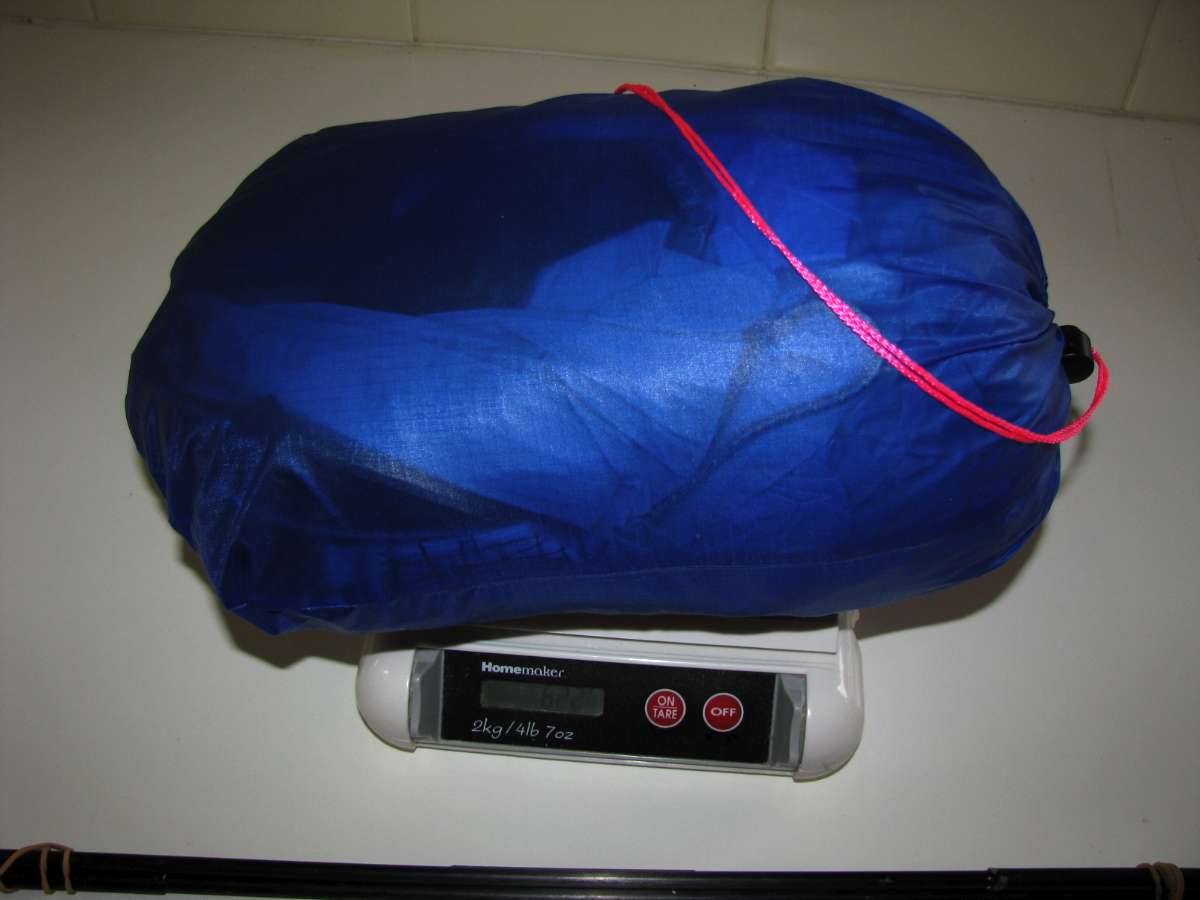
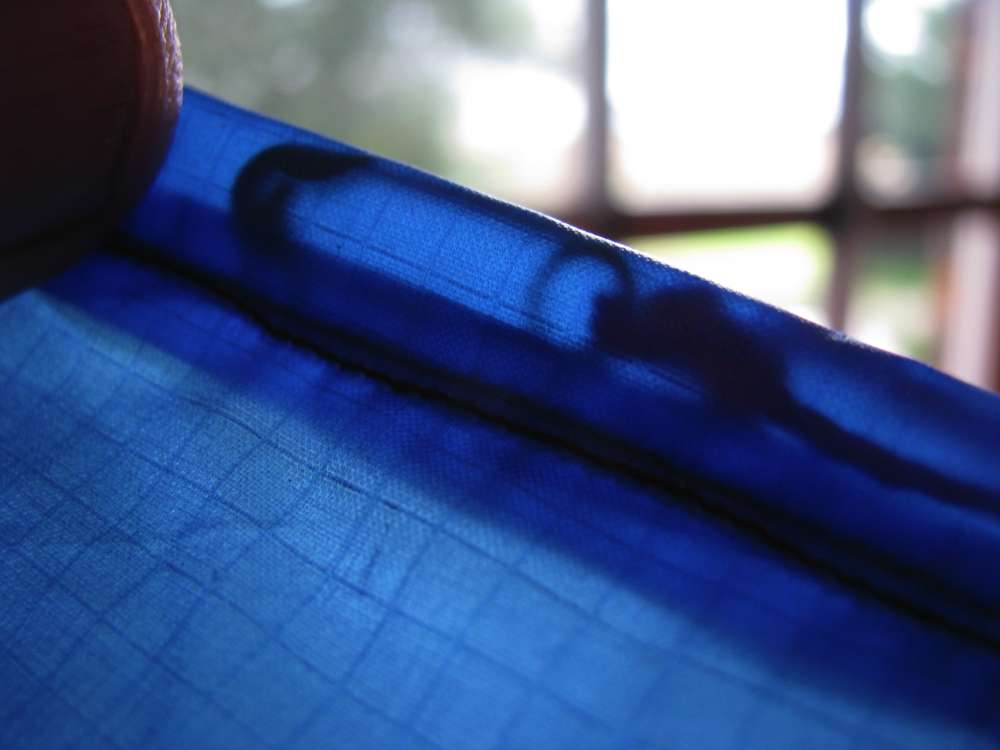
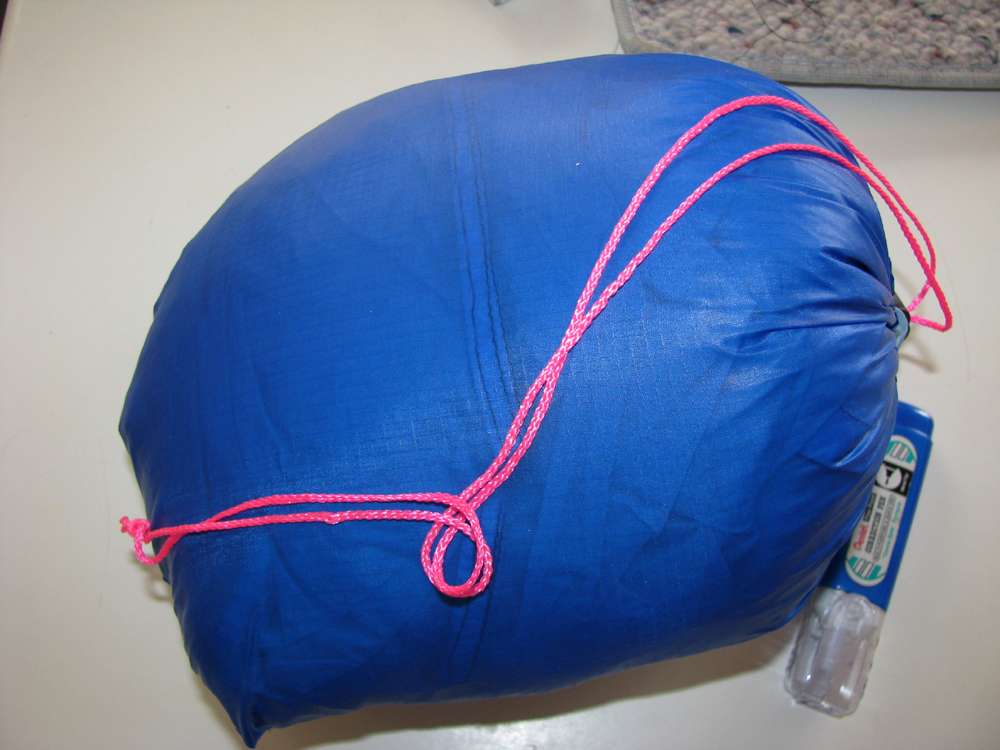
The finished bag, used to hold my latest tent, the KiloBeater Mark IVd, 622 grams, with integral floor and insect netting. All cords and pegs are inside the bag, the carbon fibre pegs inside this bag are themselves in their own little narrow ditty bag with a hard base so that the pegs don't puncture the tent.
Also, all bags and pegs are attached to the tent, so that nothing can be left behind or mislaid.
Photo: Don Hitchcock January 2009
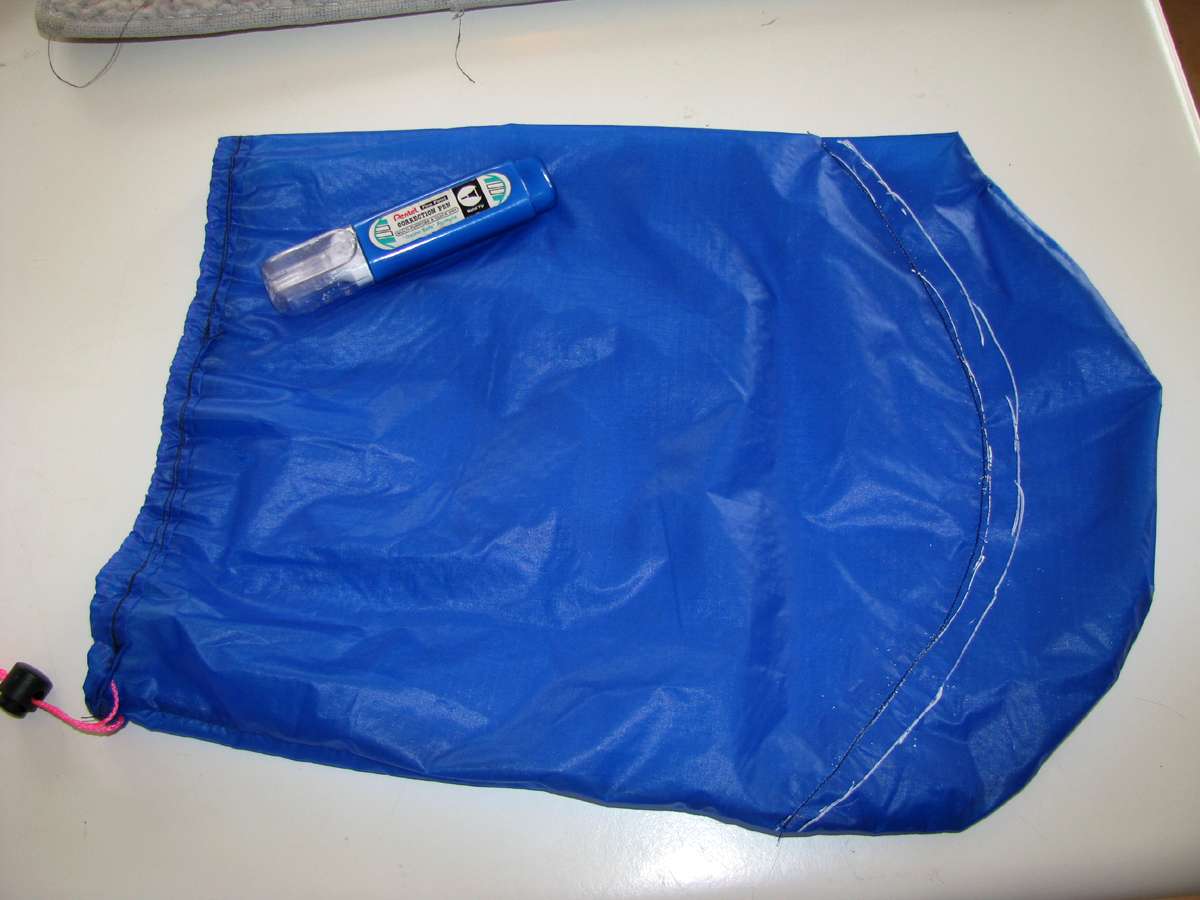
It turned out that the bag could be made smaller.
This is easily fixed.
Making it smaller saves a small amount of weight, but more importantly the tent will occupy less space in your pack.
First, mark the line which will become the new base of the bag, and sew along the line. Test with the tent (or other filling) and if it is still too big, mark and sew another line.
Photo: Don Hitchcock February 2009
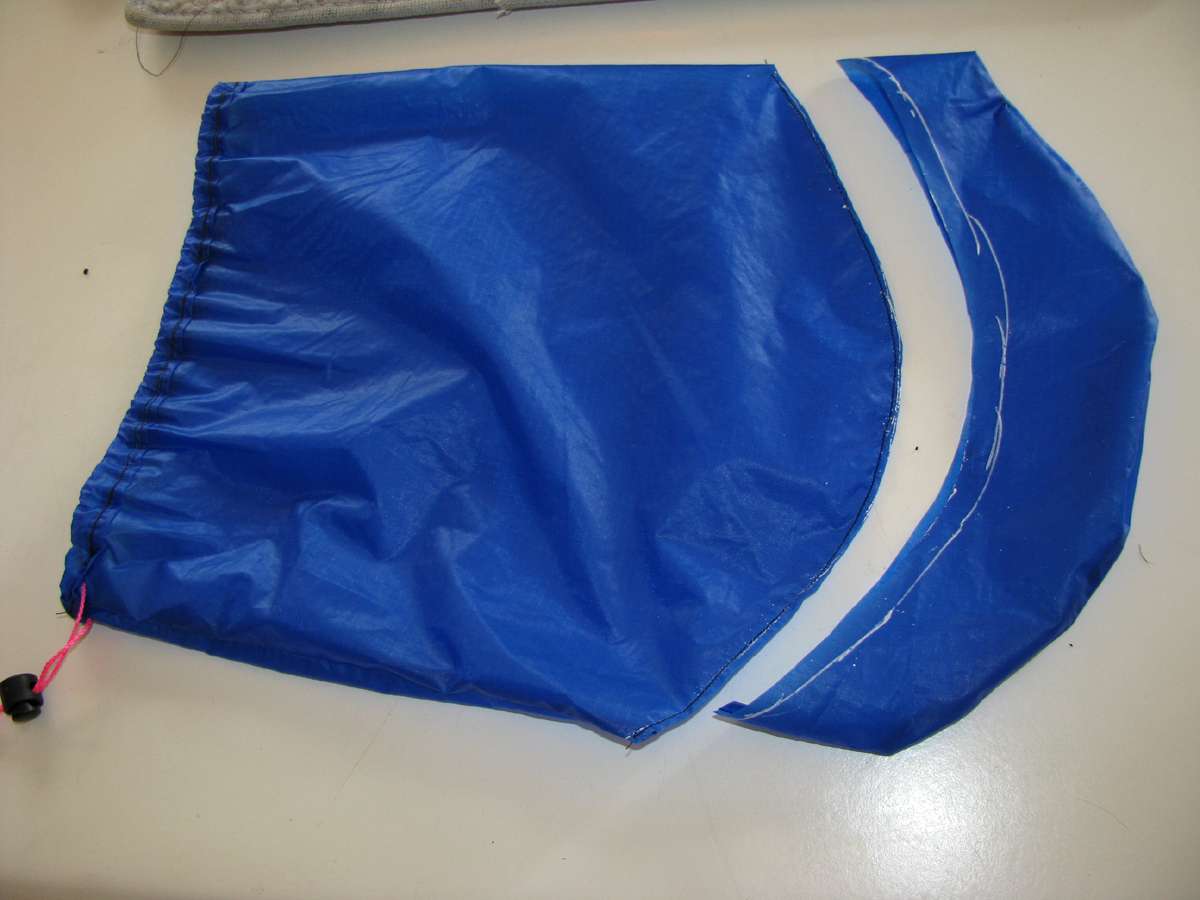
Cut the excess off, about one eighth of an inch from the sewn line.
Photo: Don Hitchcock February 2009
Turn the bag inside out, iron the edge flat, and sew as before. Turn right way out again, and Voila! a smaller bag, easily made.
Photo: Don Hitchcock February 2009
Putting a slide on a zipper
At some point you are going to need to put zippers into your gear. Useful things, zippers. At first I got the supplier to put several slides on for me when I got a length of zipper, and then I cut off what I wanted, with one zipper slide carefully included in that length.Sooner or later, you are going to have to put a slide on yourself. Sometimes you will want two slides facing opposite ways, sometimes you will want to put on a slide with two tags so you can get to it from inside and outside the tent.
As with most such things, it's easy when you know how, and close to impossible when you don't.
You need to have the first part of the zipper "open", that is in two pieces, for a short distance at least. If the zipper you are going to use is closed, tug firmly on each side and it will peel apart easily. You only need a few centimetres opened to be able to put on a zipper slide.
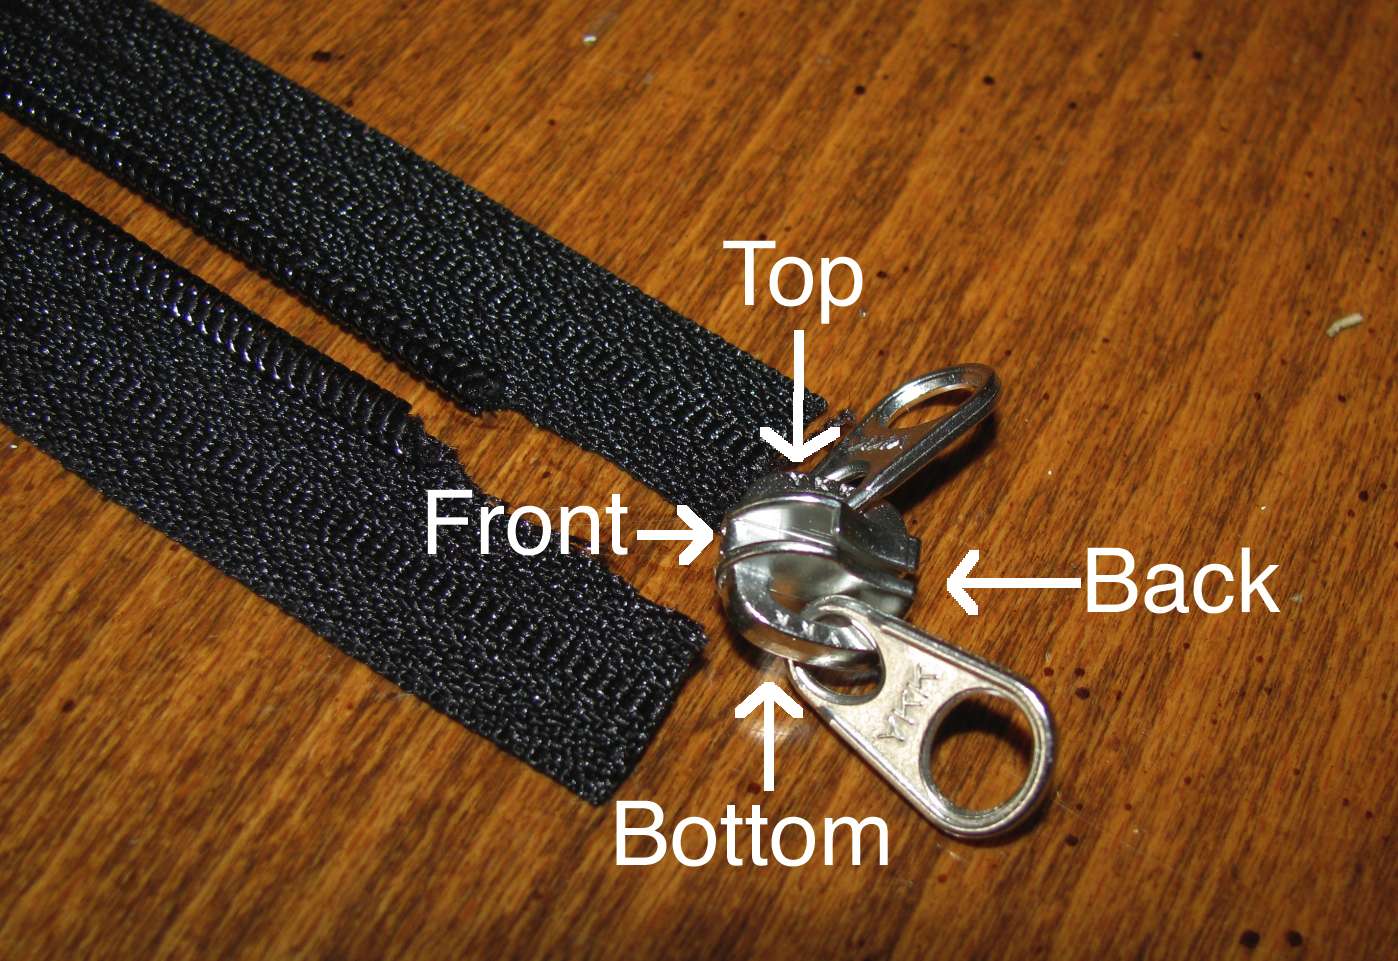
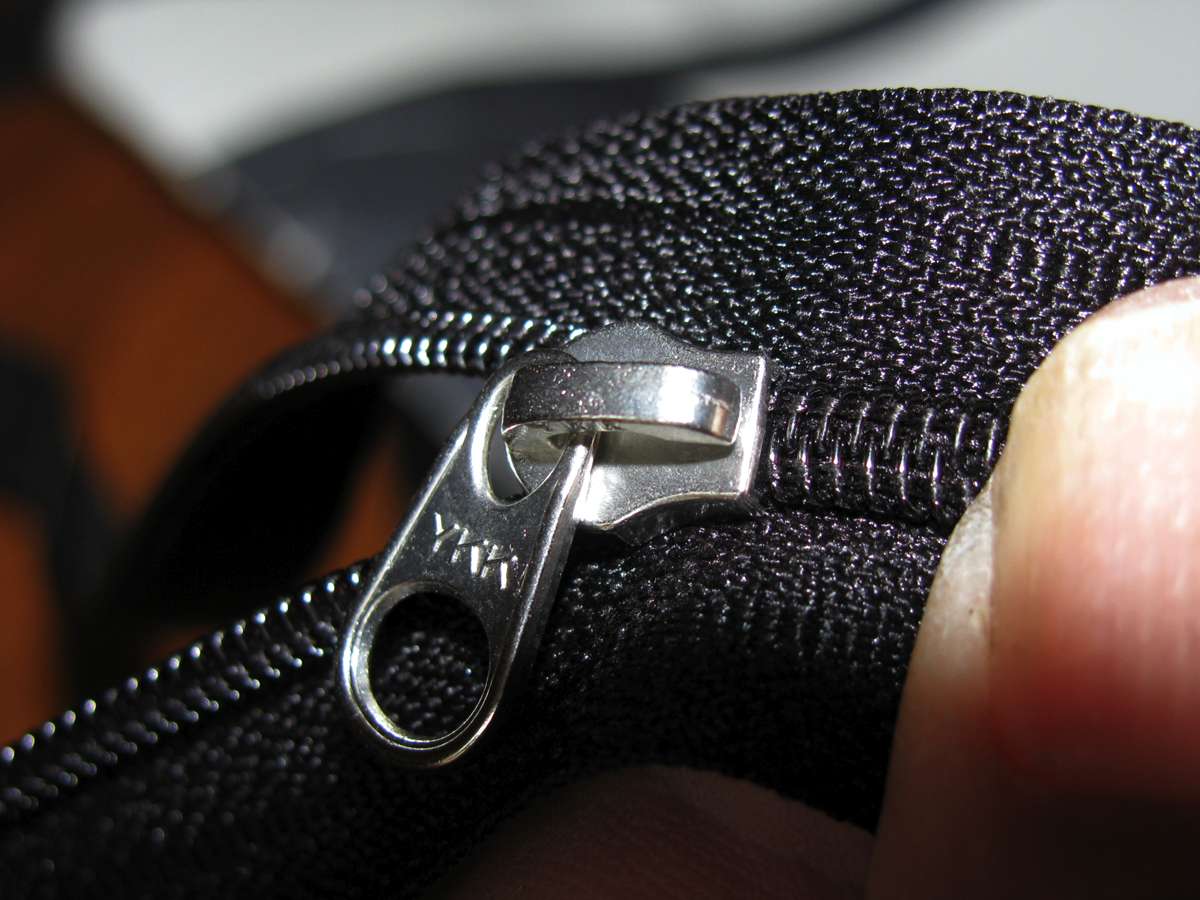
A zipper slide has a top, a bottom, a front and a back, as shown in the diagram.
The top carries an extra moulding down the side to confine the zipper, the bottom is flat where it touches the zipper.
A zipper has a top and a bottom, the top I define as the bit which stands up above the level of the material on each side. The piece of zipper shown here has the top on top.
In addition, I have cut away part of the zipper coil and material as shown, to make it easier to attach the zipper slide, and to offer a purchase on the material of the zipper so that the slide can be slid onto the zipper.
Photo: Don Hitchcock January 2009
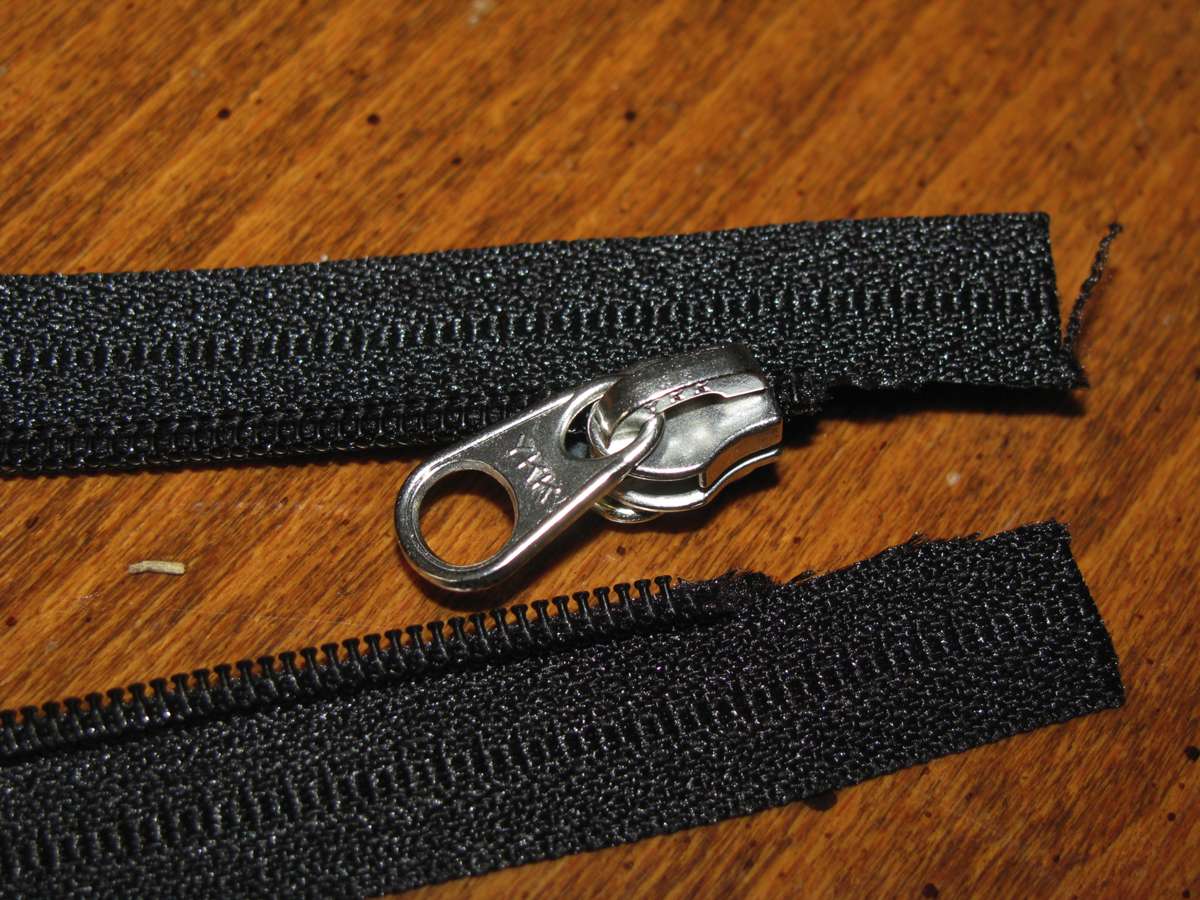
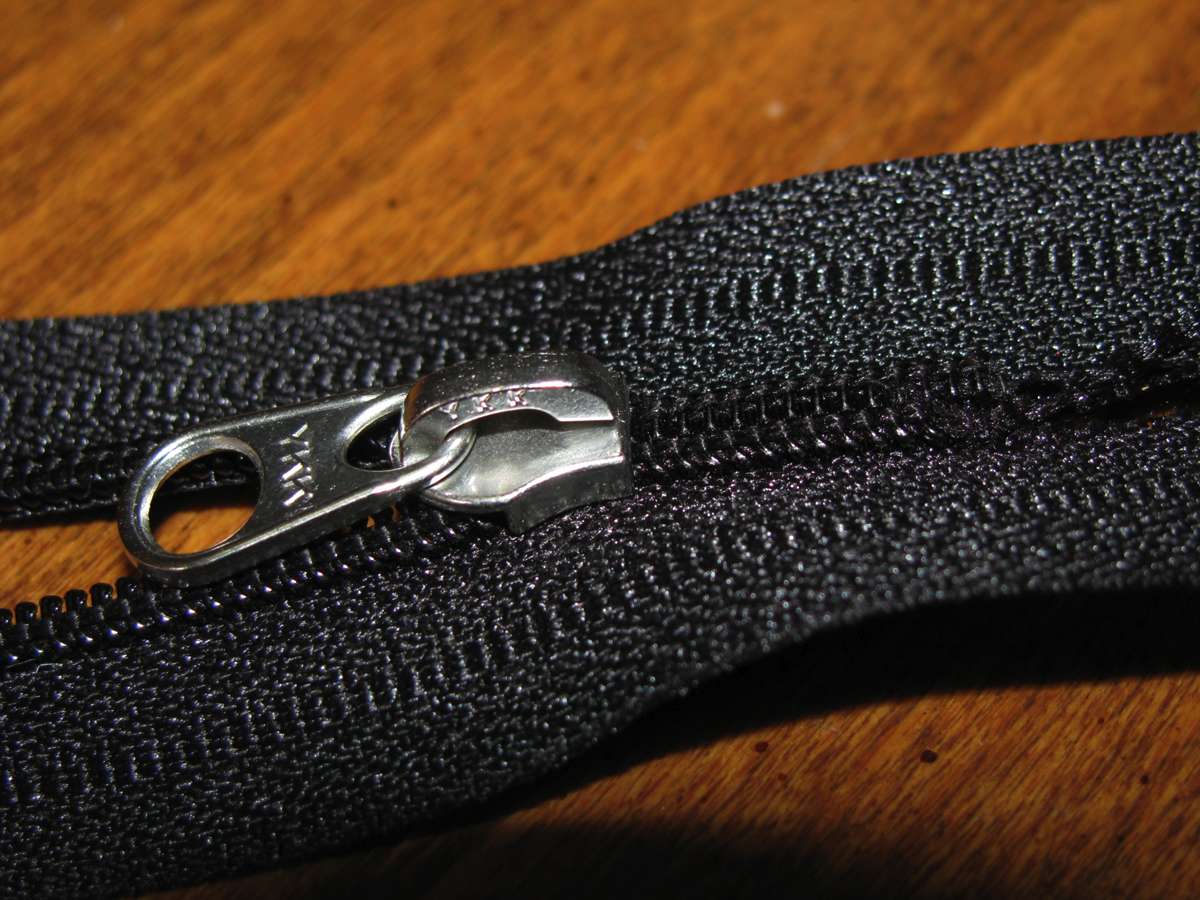
First, the front of the zipper slide, top side up, has been slid onto one of the sides of the zipper.
Photo: Don Hitchcock January 2009
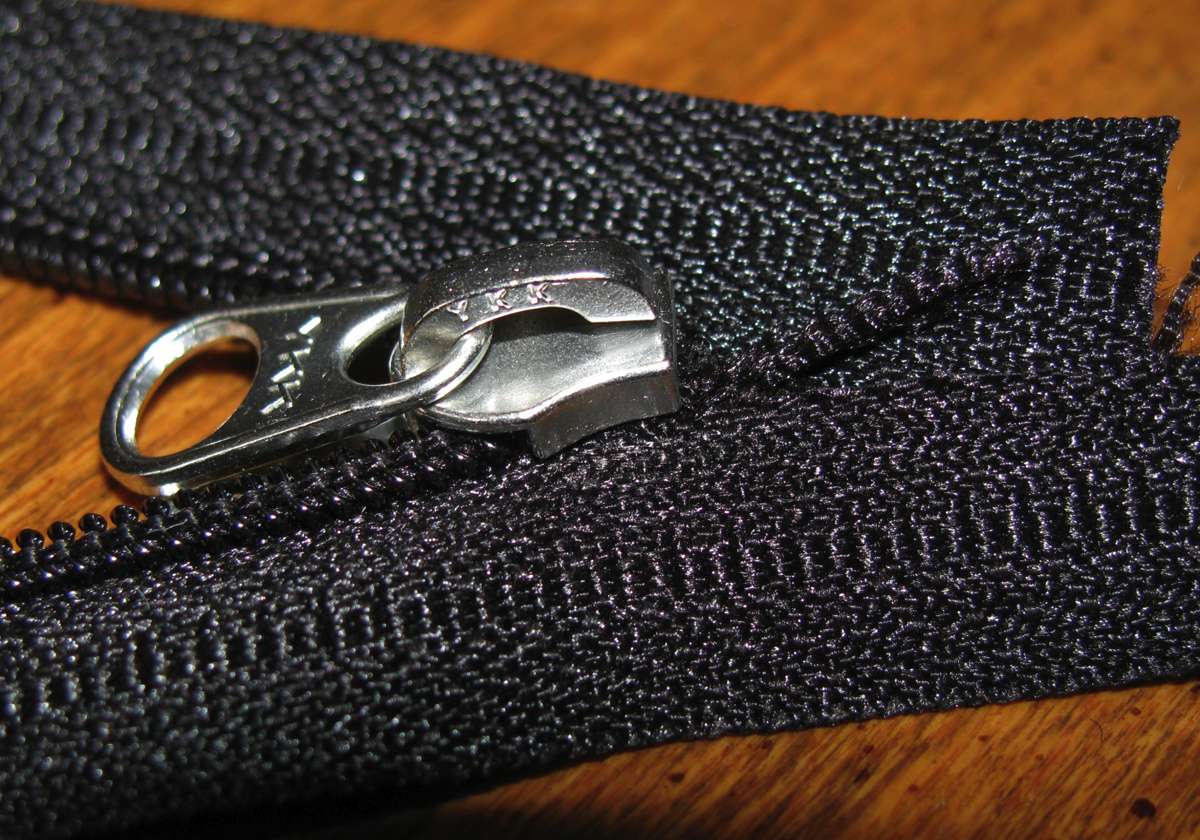
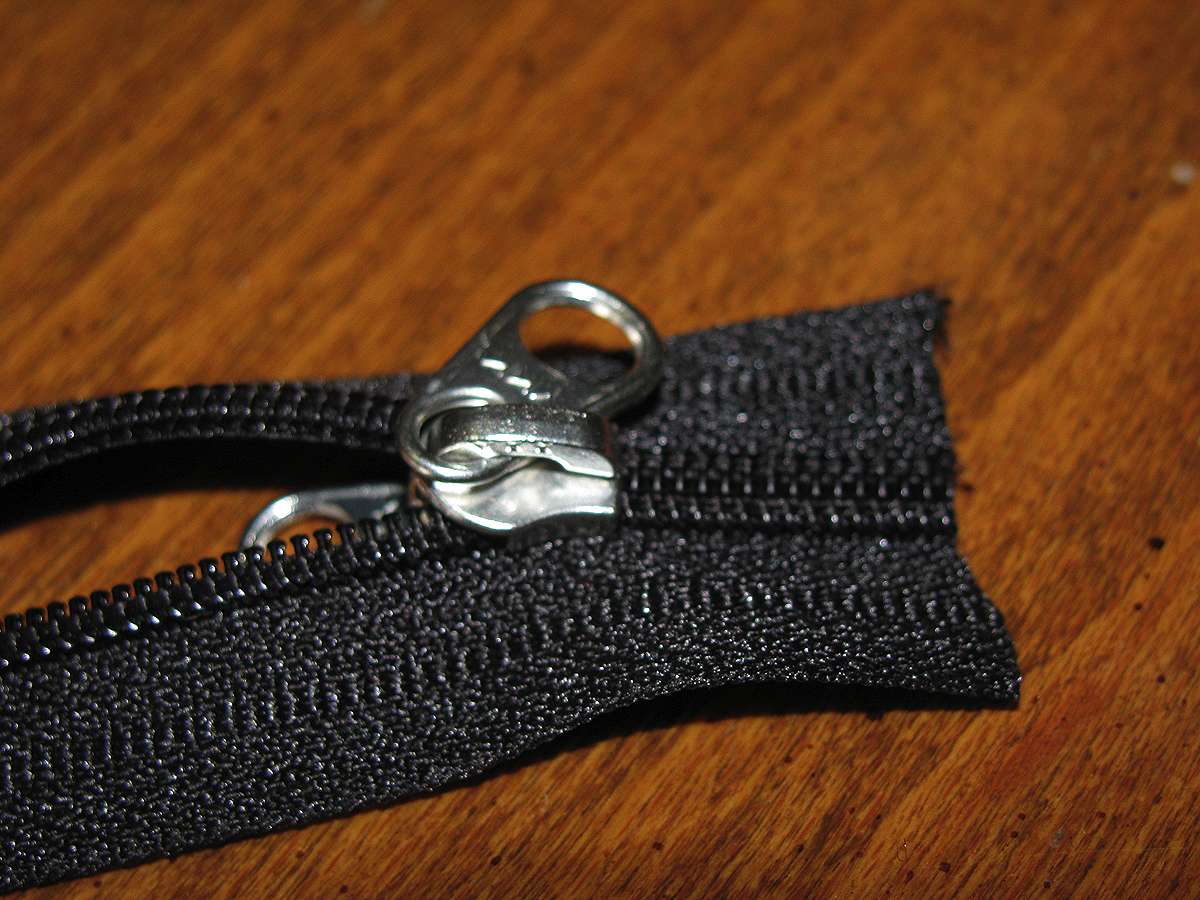
Next, the second side of the zipper has been pulled through to the start of the remaining zipper coil.
Photo: Don Hitchcock January 2009
Hold the two ends of the zipper firmly between thumb and forefinger, and pull the zipper slide onto the zipper.
Photo: Don Hitchcock January 2009
Inevitably the coil will not match from one side to the other, and in any case the two ends used for purchase need to go. Cut the zipper through at the point where it is complete.
Photo: Don Hitchcock January 2009
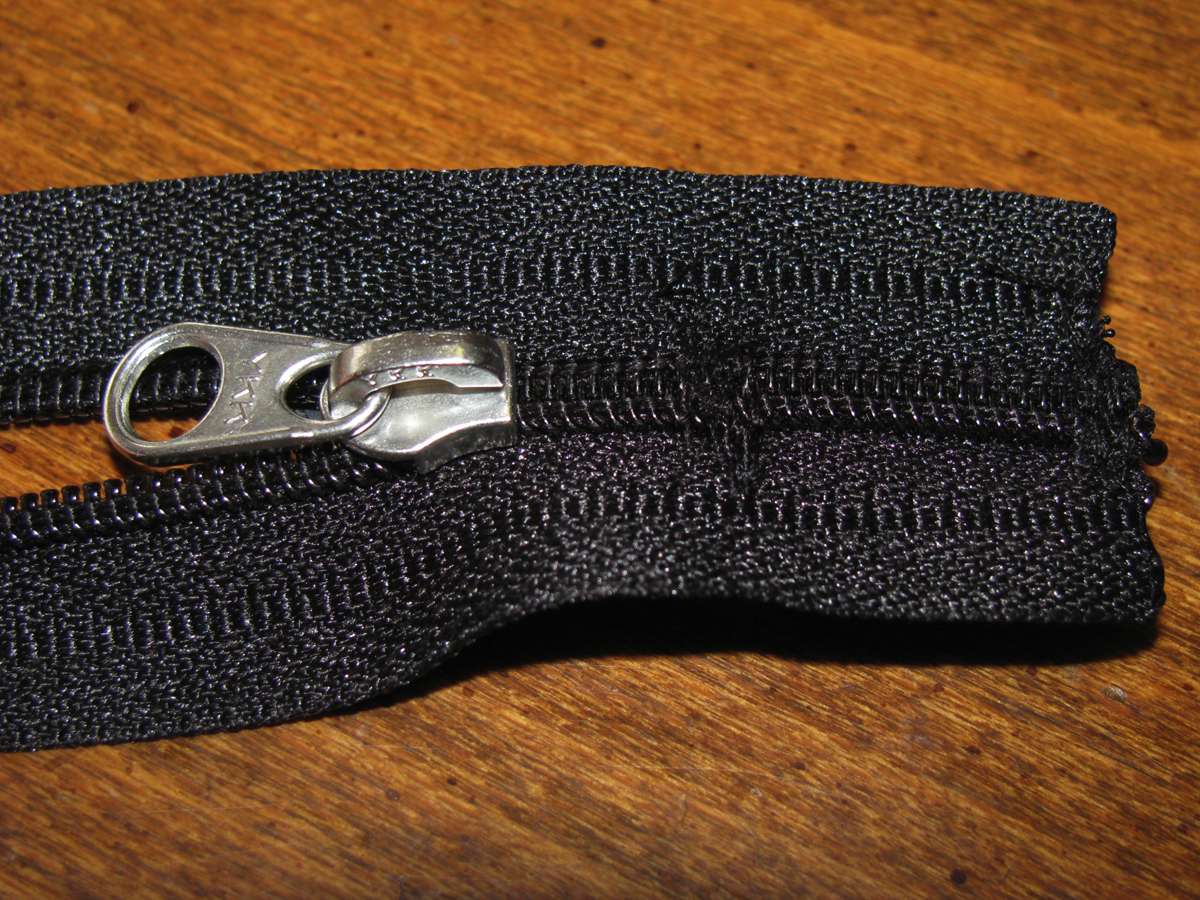
Burn the ends with a match to stop fraying, and run your sewing machine across well above that point so that the zipper cannot slide off the end. This leaves a purchase tag should you need it, often it is useful to be able to grab hold of something when trying to close a zipper. If you don't need it, cut it off closer to the sewing, and reburn the ends.
Photo: Don Hitchcock January 2009
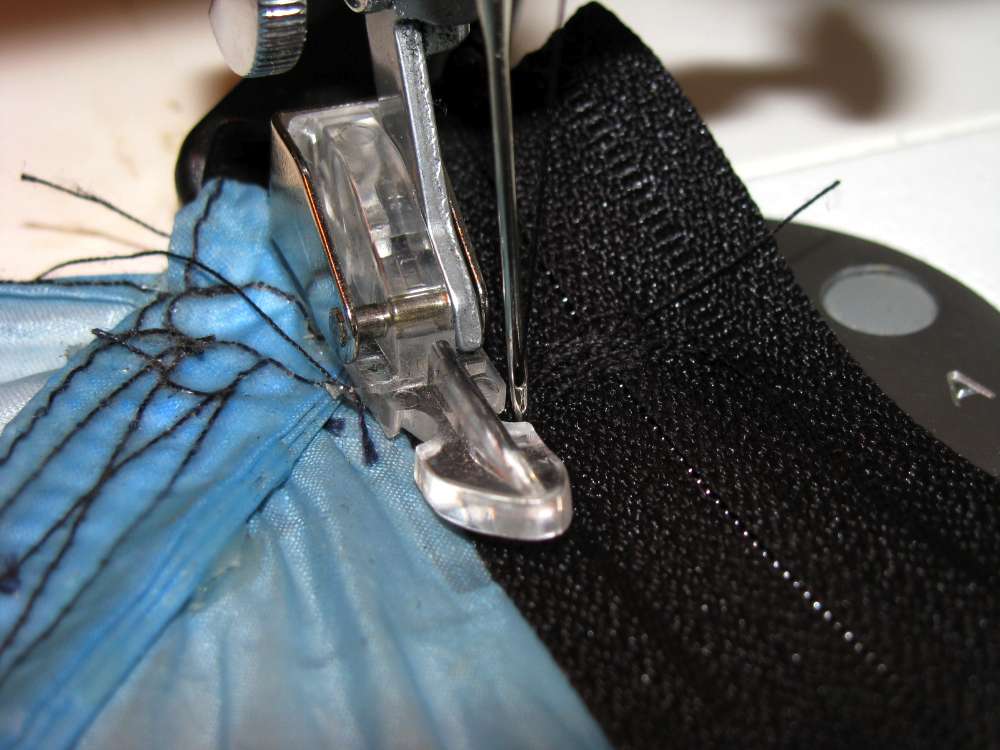
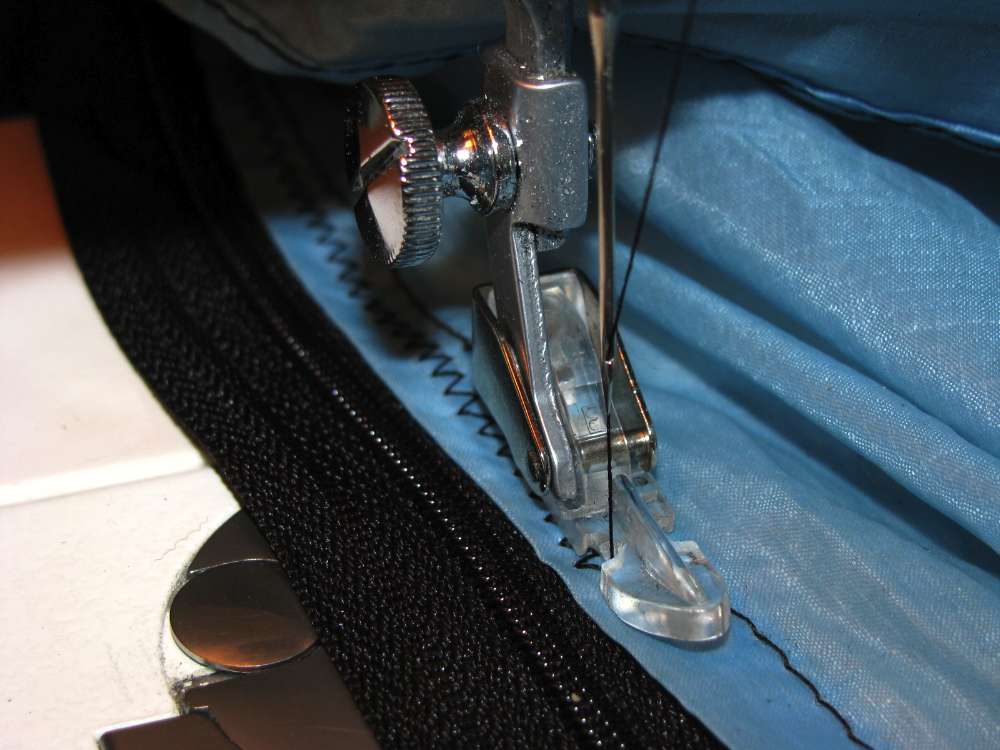
I got by for many years sewing zippers on without using a zipper foot but I should have used it in the first place, as shown here. All you do is snap off the general purpose foot and snap on the zipper foot. It can be put on in two ways, depending on which side of the foot you want the needle to go, as shown.
Photo: Don Hitchcock January 2009
Bushwalking Index
Lightweight Bushwalking / Hiking Gear
Anyone (e.g. students, libraries, government agencies such as tourist bureaus, the general public) may use, print and publish the photographs taken by me and presented on this bushwalking file for any legitimate non-commercial purpose, at no cost, and without asking permission. However a note such as "Photo: Don Hitchcock" somewhere in the document would be appreciated if it is to be published.